|
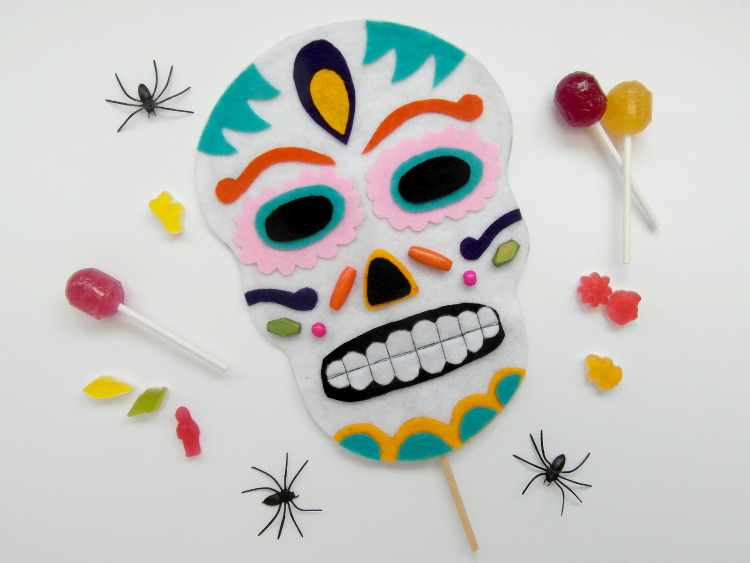
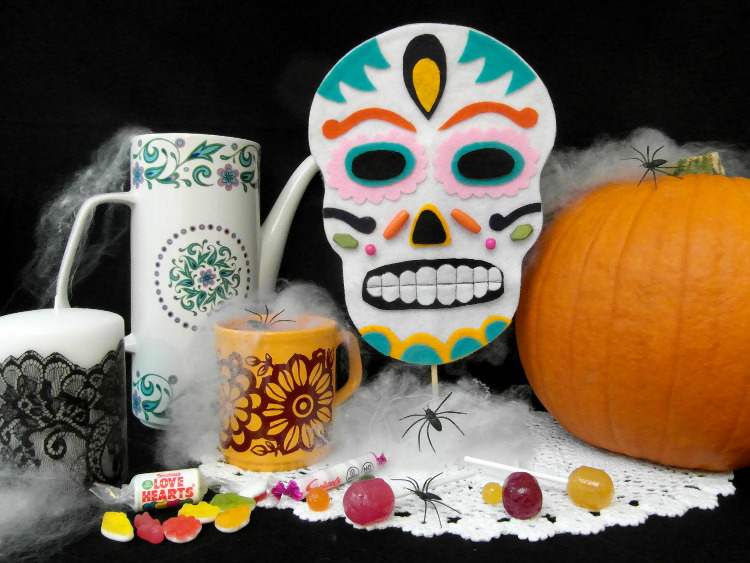
Day of the Dead or Dia de los Muertos designs have been popular in the creative world for years; sinister yet still brightly coloured and intricately patterned, they’ve been spotted as tattoos, framed prints, cushion covers and face painting designs. They also make great masks, either to wear or to use as decorations for a Hallowe’en party, and we’ve got a nifty little tutorial on how to make one from felt in just a couple of hours.
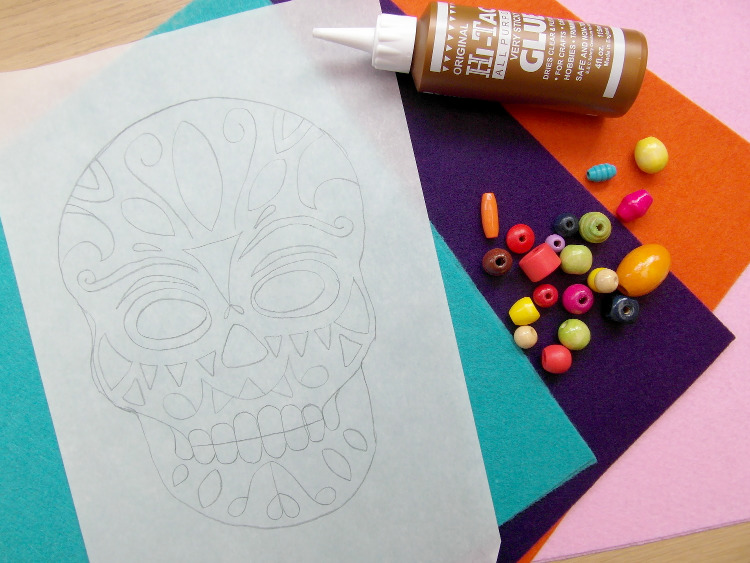
You Will Need: Several different coloured sheets of felt - we used turquoise, pink, purple, yellow, orange, black and white. Brightly coloured beads Tracing paper Plain white card A sewing machine or strong black thread Sharp scissors 1. Find your Day of the Dead design, and either print it out or trace over it. Alternatively, find a skull template and create your own, or opt for a mixture of the two. Traditional symbols are flowers, scallops and swirls. 2. Transfer the image to white card twice – once for the skull itself, and once for the decorations. Cut the pieces out carefully.
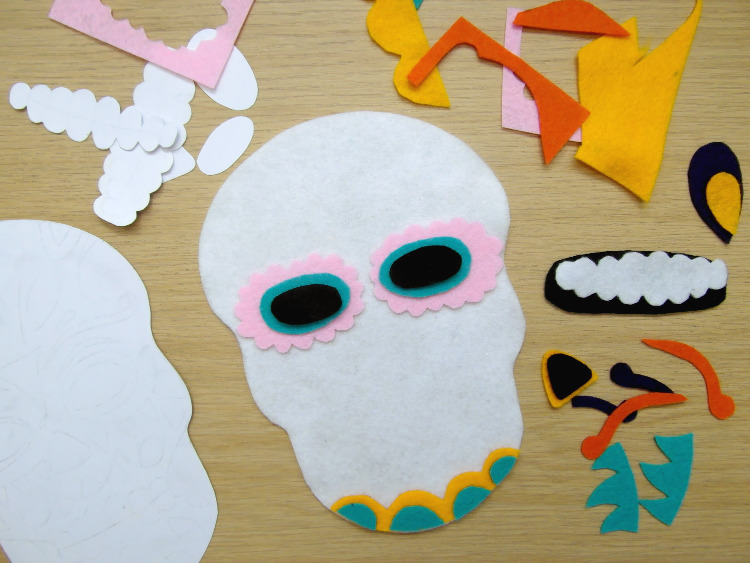
3. Decide which colours you want to use – the brighter, the better – and then place your templates onto the sheet of felt, draw round them and cut out the pieces. (If you’re going to be wearing the mask, don’t forget to cut out the eye holes!) 4. Apply glue to the pattern pieces, and then press them down onto the skull shape. Weigh them down so the glue bonds properly, and leave in a warm place to dry thoroughly. 5. Once the glue is dry, stitch the details onto the teeth, either using a sewing machine or needle and thread.
There are now a few different options, depending on whether you’re using it as a handheld or tie on mask, or as a decoration: For a handheld mask: Cut a second skull shape from felt, and attach a thin piece of wood to it using the fabric glue. Once it’s dry, apply more glue to the underside of the mask, and press it down so the wooden handle is sandwiched in the middle. Weigh the whole thing down with heavy books or boxes, and place somewhere warm to dry. For a tie-on mask: Follow the steps above, but rather than attaching a stick, stitch two pieces of ribbon to the side of the skull shape, and then sandwich the whole thing together using the glue. For decorations: The masks can also be used as garlands, simply by making several, and then threading them onto a length of strong cotton. Thread brightly coloured beads in between each skull to make it really stand out this Hallowe’en. |
  Email: info (at) stickytiger.co.uk Phone: 0115 8800 700 |