|
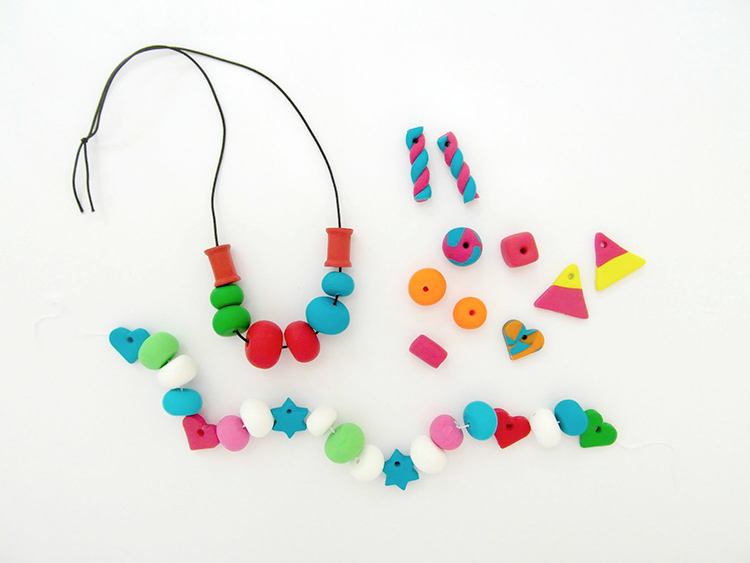
Favourite material of artists and jewellery makers everywhere, Fimo is one of the most versatile craft materials on the market; easy to shape and harden, it can be used to make beads, pots, badges, hairclips, collar clips and a whole range of other things. Especially great for kids, we’ve come up with a quick tutorial on making your very own Fimo beads, in a variety of shapes and sizes.
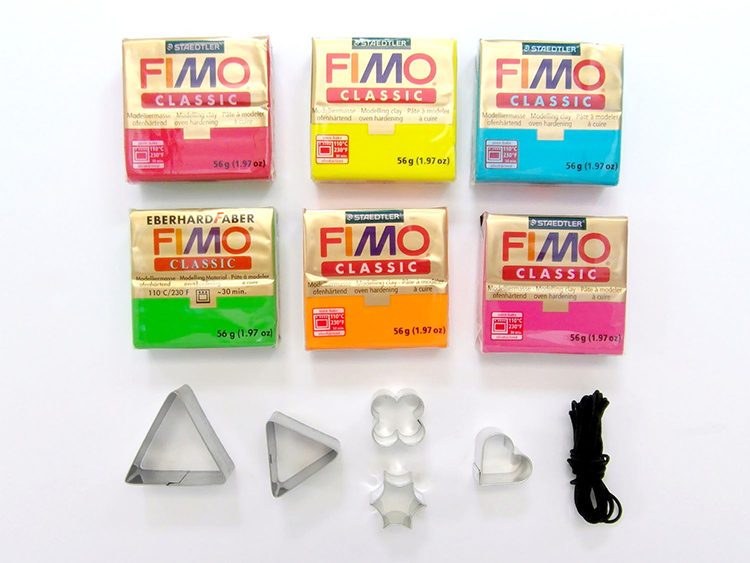
You Will Need: Plenty of Fimo in different colours (it’s always good to have a neutral colour in the mix) Jewellery String A small rolling pin Small cookie cutters or a knife (adult supervision strictly advised) A flat, clean surface 1. To get the most from the Fimo, spend a bit of time working it between your hands; warming it up by twisting and folding makes it more malleable and less likely to crack when you roll it out afterwards. If you’ve got very young children, it might be worthwhile getting hold of some Fimo Soft, which is a little easier to mould for small hands.
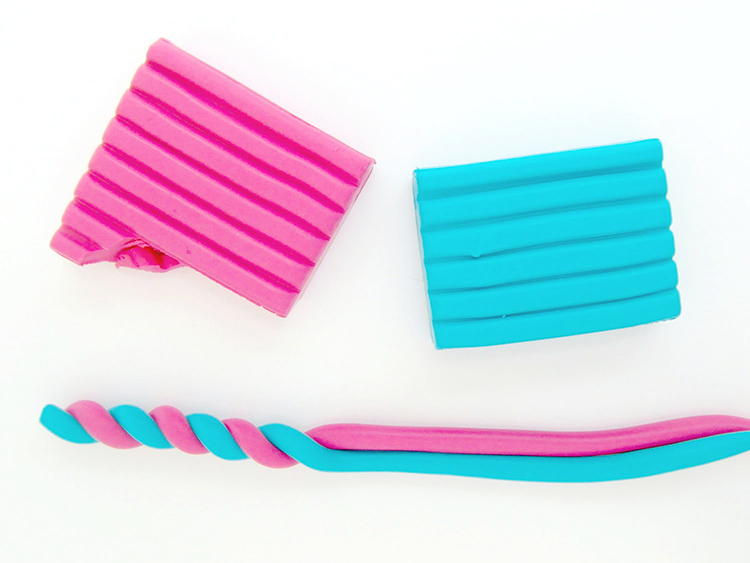
2. To make a candy-cane style bead: Take two balls of Fimo in contrasting colours, and work them until they’re soft. Place one between your hands and roll until you end up with a long, snake like piece. Repeat for the second colour, then lay them both on a flat surface and make sure they’re roughly the same size. Fold one piece over the other, then pick them both up and twist together until you have one long section, then trim the end with a knife. 3. To make a stripy bead: Decide which colours you want to use, then work them between your hands until they’re soft enough to be rolled out – you’re going to need about four layers for this bead, so either alternate the colours or use four completely different ones. Place the first piece on a flat, clean surface and roll out gently with the rolling pin – first roll one way, then the other until you have a large, flat piece. Repeat the process for the other three pieces, then lay them all on top of one another. Trim into a rectangle, then roll the whole parcel up and cut into sections.
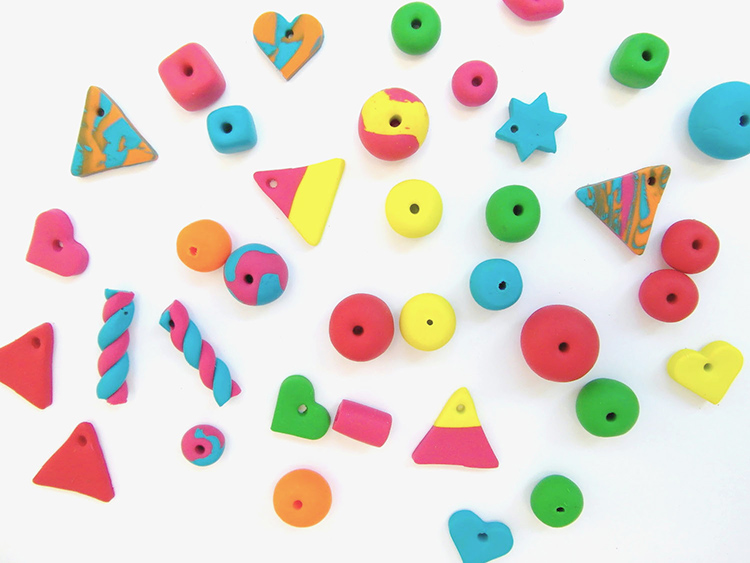
4. To make a marble-effect bead: Take two contrasting colours, and work them both until they’re soft. Place them both in the same hand, then press together and twist so the colours begin to merge. Repeat the process until you get the desired effect – don’t work the Fimo for too long, though, otherwise the colours will blend together completely. Once you’ve done this, you can either roll it into a ball and make it into a round bead, or roll it out with the rolling pin and cut out shapes with the cookie cutters. 5. Once you’ve finished making the beads, place them onto a non-stick baking tray and bake in the oven according to the packet directions. Remove and leave to cool.
|
  Email: info (at) stickytiger.co.uk Phone: 0115 8800 700 |