|
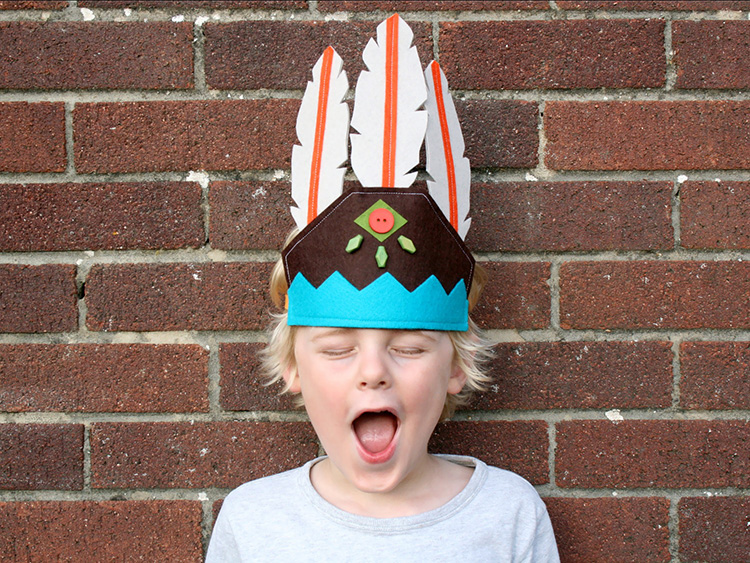
The best kind of craft project for kids is one where they actually have something tangible at the end of it; a painting on the wall is nice, but how much better is it to have say, a pot that you can keep things in, or a homemade cloak to swish around behind you? This week, as part of our crafting with kids series, we’re going to show you how to make the simplest ever feathered headdress; made entirely from felt, there’s no seams, no fraying and no hassle.
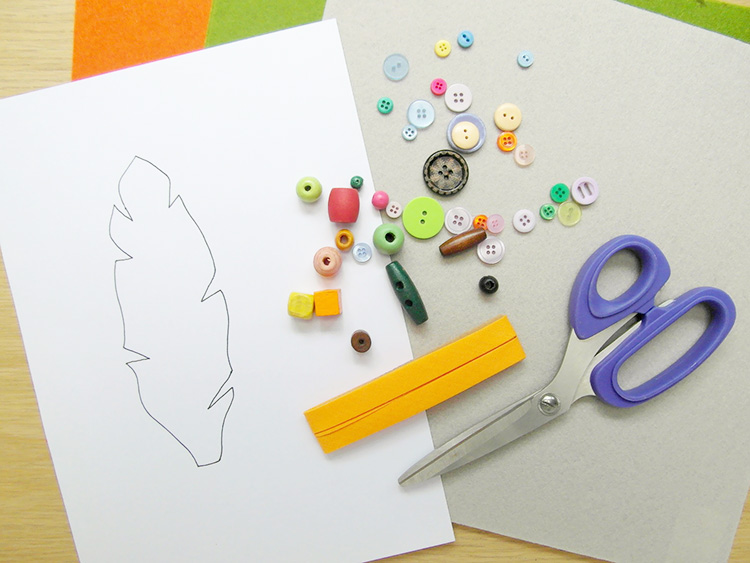
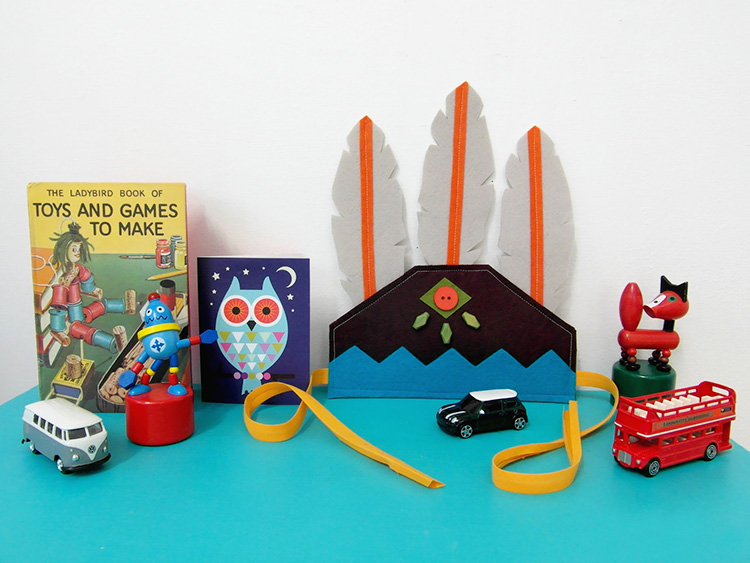
You Will Need: Several sheets of felt in different colours – the brighter the better! Buttons, beads and any other haberdashery items that you might want to add on A length of bias binding or ribbon Sharp scissors White card A sharp pencil A needle and thread or a sewing machine 1. Firstly, decide on your design; you need to create a card template for every piece you’re going to cut out of felt. We used one template for the main body, one for each decoration and one for the feathers, but you can add on as much or as little as you like.
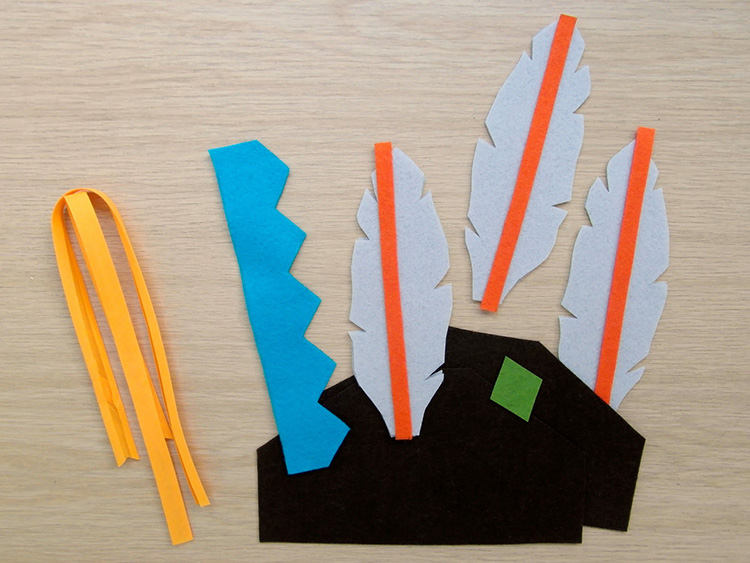
2. Once you’ve cut out your cardboard templates, place them onto the felt, draw round them and cut them out. For the main section and the feathers, you’ll need to do this twice as they each need two layers to make them stiff enough to stand up straight.
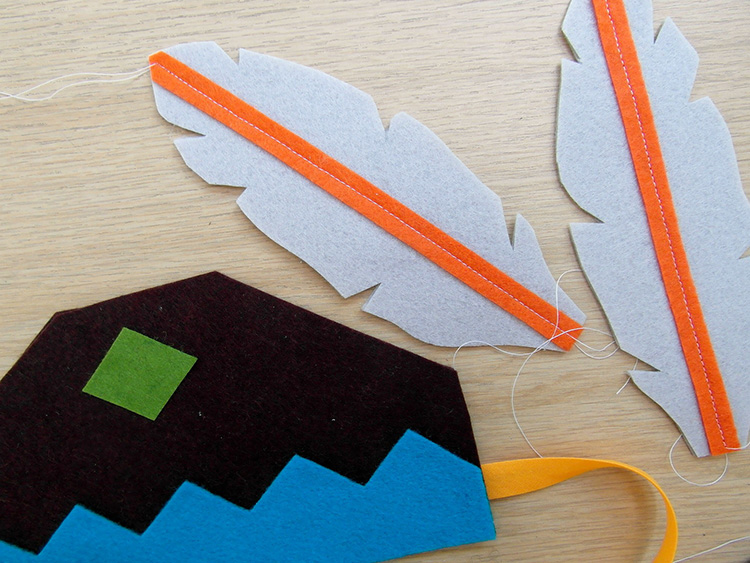
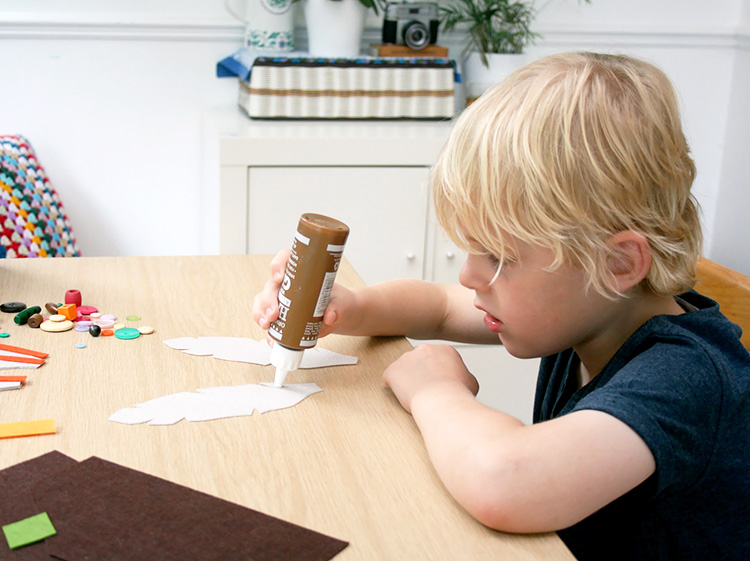
3. Starting with the feathers, glue the two pieces together and allow to dry thoroughly. Then either using the sewing machine or the needle and thread, stitch down the centre of each feather – this makes them less likely to flop over. (If you’re crafting with an older child, this can be a nice introduction to sewing.) 4. Cut the length of binding or ribbon in half, making sure that it’s long enough to tie the headdress onto your child’s head securely. Glue onto the sides of one of the main section pieces and leave to dry.
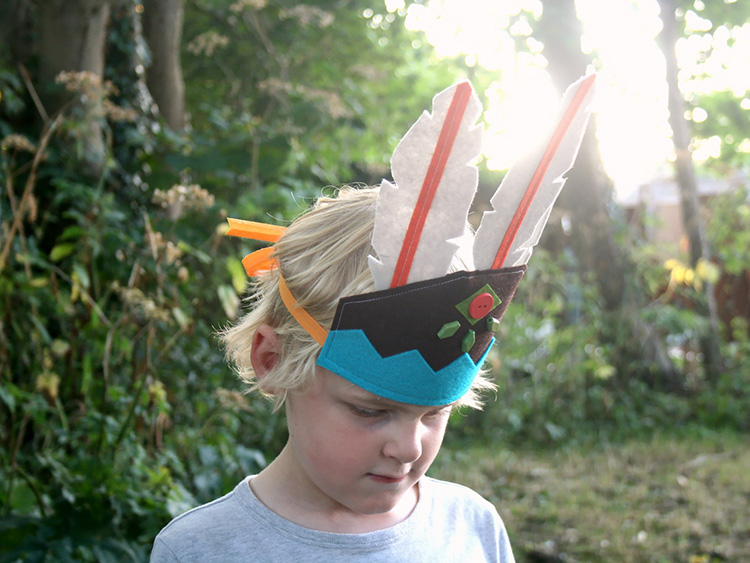
5. In the meantime, glue the felt decorations onto the other main piece, and leave that to dry thoroughly as well. 6. Once the glue is thoroughly dry, sandwich the feathers between the two main sections, and either glue or pin in place. Stitch around the edges to make sure everything stays together (this bit is usually best done by an adult, but if your child is a competent sewer, let them have a go). 7. Add on any extra buttons and beads, then tie onto your child’s head and set them free!
Top Tips 1. When using fabric glue, make sure all surfaces are covered, and there are baby wipes around just in case. If you’re working with an older child, a sheet of paper should do, but for a pre-schooler, a mess-mat is a better idea. 2. Let them really get involved with every step; from choosing the colours of the felt to sticking on the beads and buttons, there’s pretty much nothing they can’t do in this projects. 3. This is a great way to introduce children to sewing, as there are no seams or fiddly bits, and you don’t have to worry about the fabric fraying because felt is fray-proof. Hurrah!
|
  Email: info (at) stickytiger.co.uk Phone: 0115 8800 700 |