|
Hallowe’en is coming up, and if you’re looking for a quick project to help you join in the fun, we’ve got some great little pumpkin badges that can be made in just over an hour. Made using nothing but felt, glue and a sewing machine, these are great if you’re not into full-on fancy dress but still want to keep it seasonal.
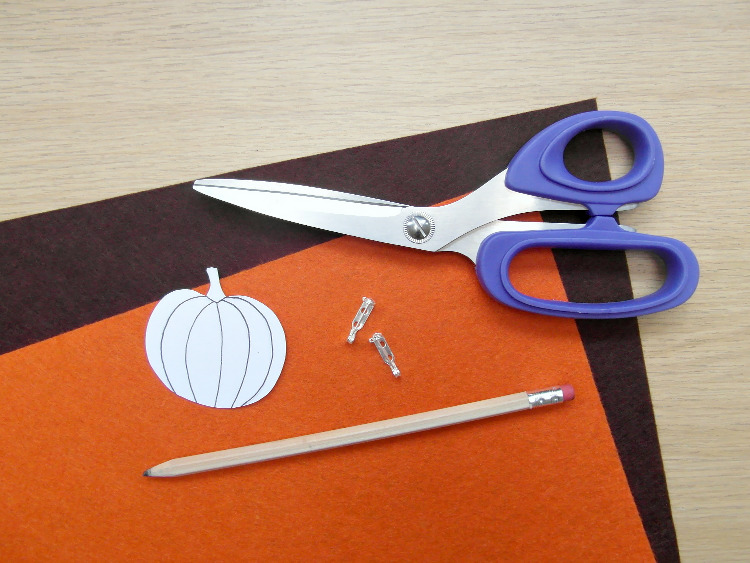
You Will Need: Coloured felt in orange, brown and black A corsage pin back Plain white cardboard A sewing machine or needle and cotton Sharp scissors 1. Find a pumpkin template that’s the size you want your badge to be, then either print it out or trace it onto a sheet of card and cut it out. 2. Place your template onto the orange felt, draw round it and cut it out, and then repeat for the brown felt – remember to draw a separate stalk on the brown felt as well, as you’ll need one to put on top of the orange layer.
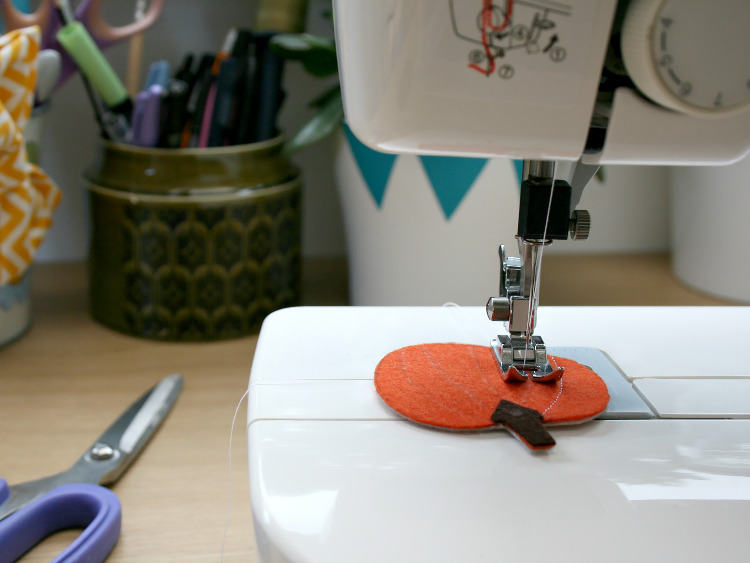
3. Mark where the ridges of the pumpkin need to be on the orange shape, then stitch over the top in white cotton either by hand or using a sewing machine. 4. Apply some glue to the back of the brown stalk, and place it on top of the pumpkin – press down firmly, and then weigh the whole thing down with some books or something heavy.
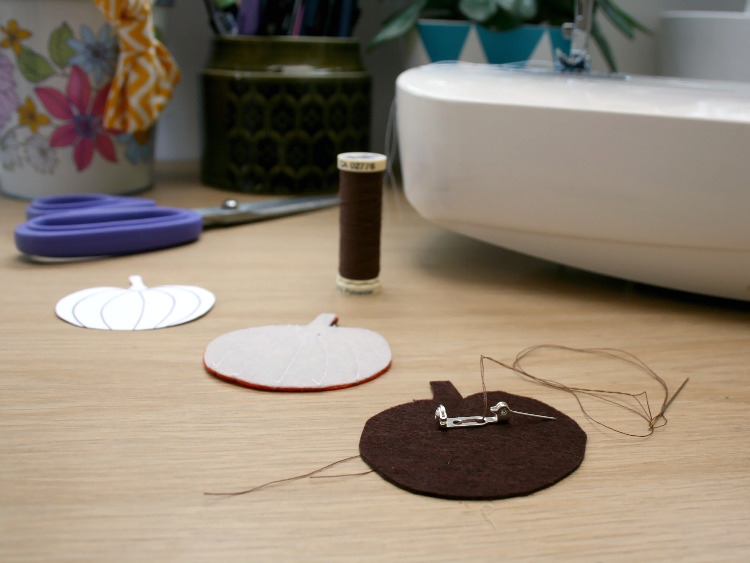
5. While you’re waiting for the glue to dry, stitch the corsage back onto the brown felt pumpkin shape and secure the ends of the thread. 6. Apply some glue to the back of the orange pumpkin, and place it on top of the brown one, then cut out a face from black felt and attach that to the top using the glue. Weigh everything down with something heavy, and then place somewhere warm until the whole thing is thoroughly dry. 7. Pin your badge to your top or bag, and wear it with pride! |
  Email: info (at) stickytiger.co.uk Phone: 0115 8800 700 |