|
In the third of our festive gift tutorials, we’re concentrating on something you can make for anyone; Mums, Dads, boyfriends, girlfriends…. even the littluns can get a look in on this one. Today, we’re doing an ultra quick and easy DIY printed t-shirt. Printing t-shirts is a great way to add an individual twist to clothing, but it doesn’t mean you have to go out and buy loads of screen printing equipment, or carve up hundreds of potatoes. We’re going to show you how to make a simple stencil and then print over it without a roller in sight – fast, simple and fuss-free. The best kind of homemade gift!
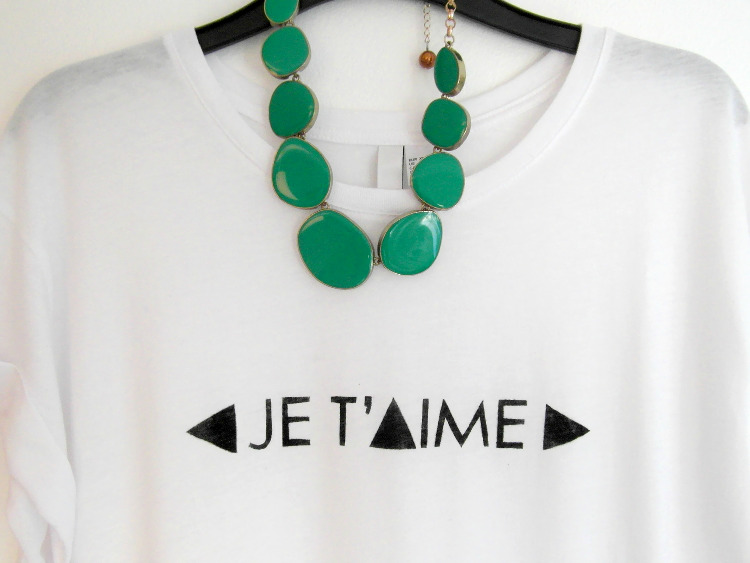
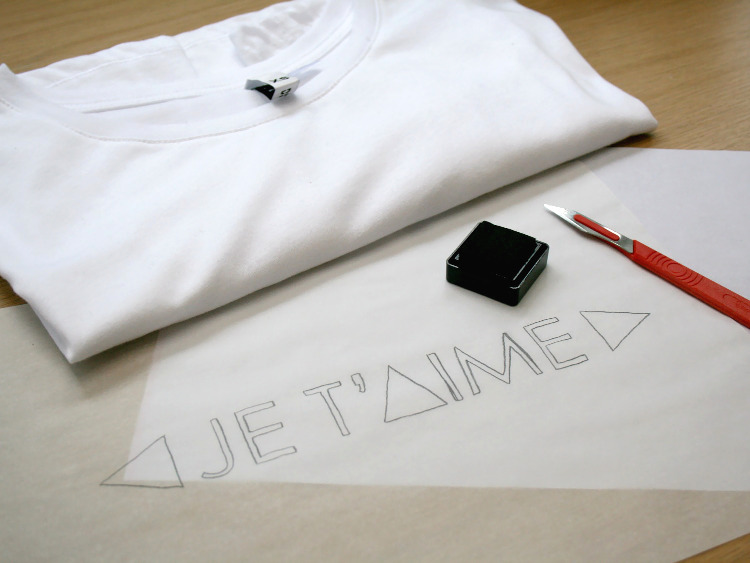
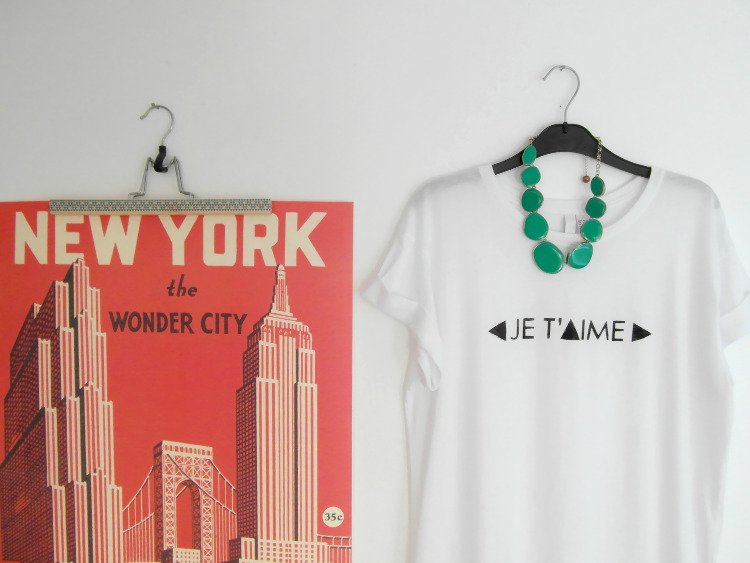
You Will Need: A plain white t-shirt (you can obviously use a coloured one, but your choice of ink colours will be more limited.) Printable acetate sheets A small Versacraft ink pad in your chosen colour A craft knife with a sharp blade A cutting mat Tape Some thick cardboard 1. Start by deciding on the design for your t-shirt, and either draw it out or print it from a computer and draw round it. French phrases are quite popular at the moment, so we went with a simple ‘Je T’Aime’ with some triangles for a little added quirkiness. 2. Turn your design face down on top of the paper side of the acetate sheet, and trace over the reverse so the image is transferred to the acetate.
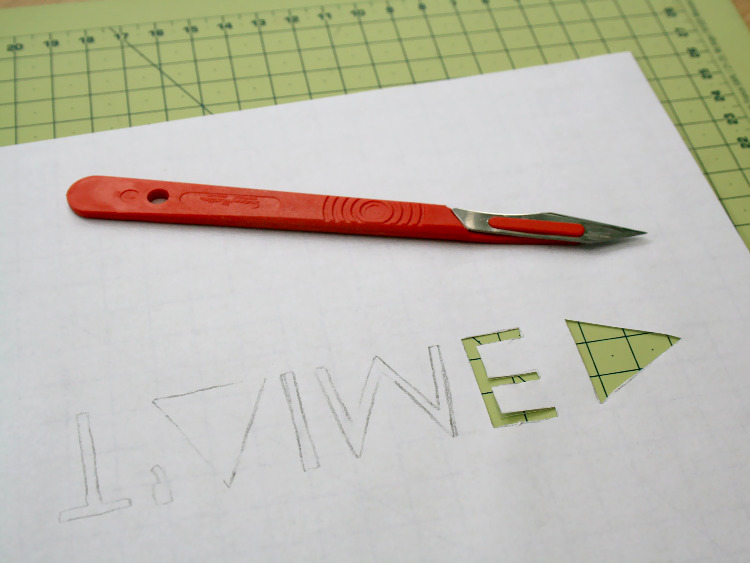
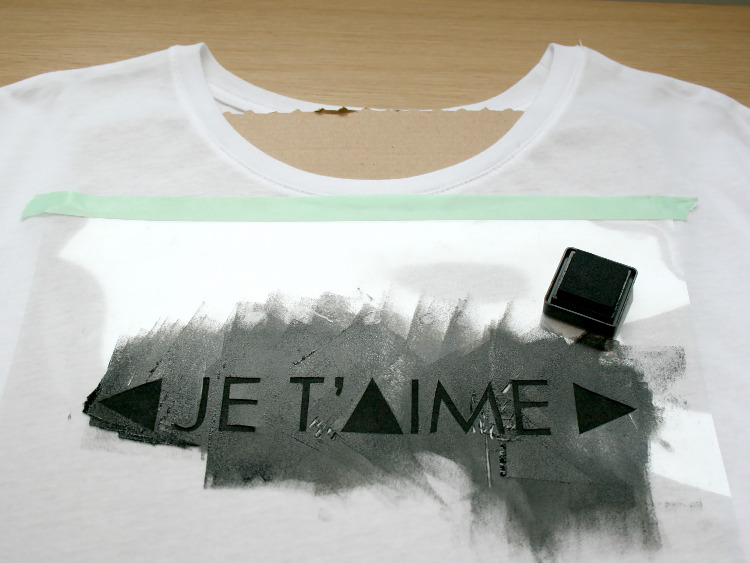
3. Secure your acetate sheet to the cutting mat, then carefully cut out your design with the craft knife. Although it’s backwards at the moment, once you remove the paper layer and turn it over, it’ll be the right way round again. 4. Discard any excess acetate, then remove the paper sheet. Place the layer of cardboard inside the t-shirt where you’re going to be printing (this prevents the ink from going through to the back of the t-shirt), and then secure your stencil in place with some tape.
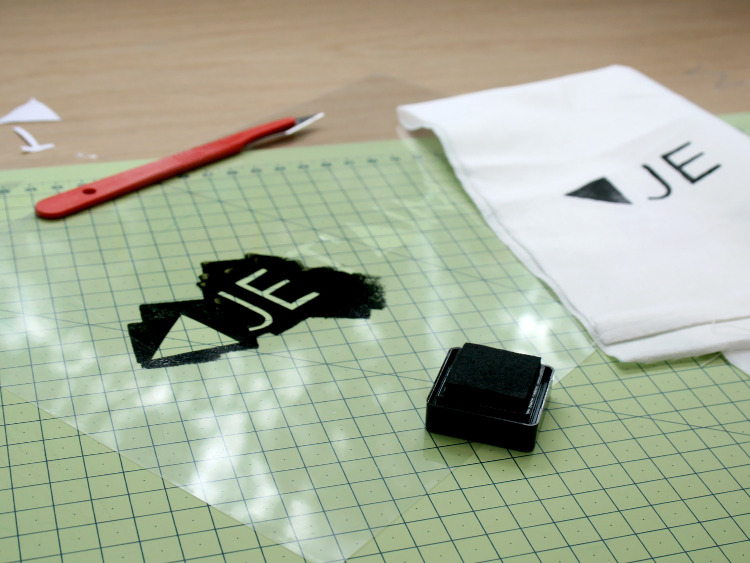
5. On a spare piece of fabric, test your stencil to make sure there are no wobbly edges, and to get a feel for how the ink distributes itself. It’s way better to take it slowly, and do two or three coats than it is to try and soak the t-shirt with ink so you finish more quickly; if you press too hard and apply too much, it’s more likely that the ink will leak under the stencil, or spread before it has time to dry.
6. Ink gently over your stencil and onto the t-shirt, making sure that you get a nice even coverage without applying too much. Leave to dry and then repeat two or three times until you have the desired effect. 7. Once the final coat is dry, remove the stencil and then iron over the top on a dry setting to heat set the ink – this will stop it coming off in the washing machine.
|
  Email: info (at) stickytiger.co.uk Phone: 0115 8800 700 |