|
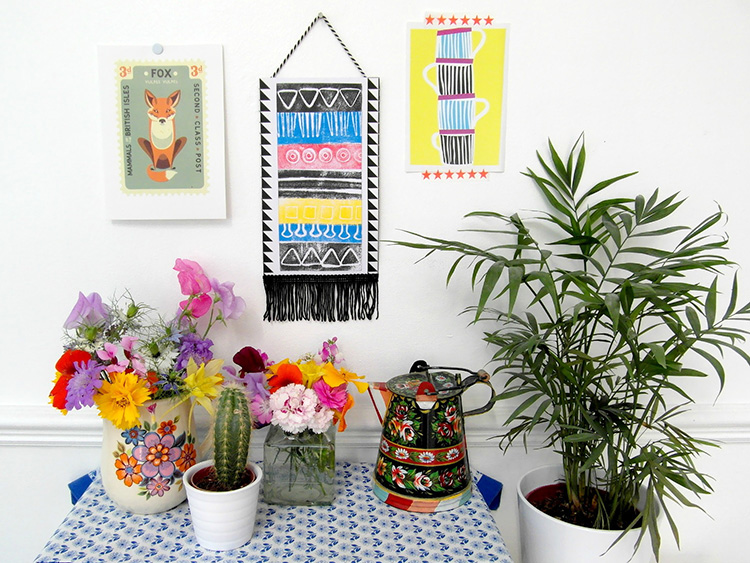
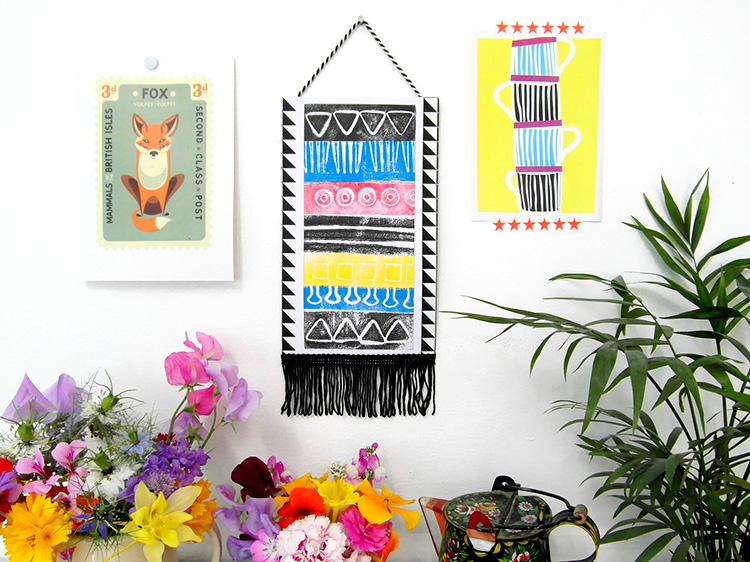
Geometrics and Aztec prints have been everywhere this past year, from clothes and shoes to cushions, bedding and even wall decals – and the graphic shapes and bright colours are showing no signs of going away any time soon. A great way to get in on the act is to add some Aztec artwork to your walls – we’ve come up with a great little tutorial on how to make your own geometric wall hanging from ink pads and moldable foam stamps.
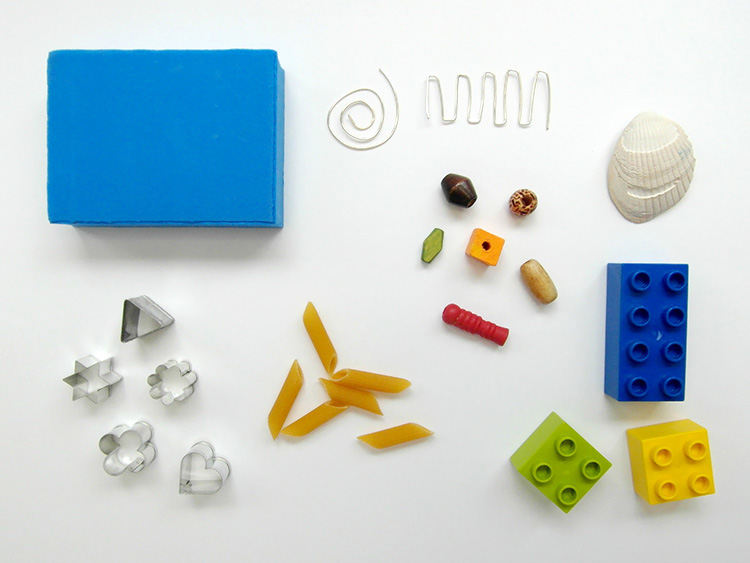
You will need: Ink pads in colours of your choice – we used Versafine and Versacraft for their even coverage and vibrant shades Plain white card A small piece of fringing (you could always make your own by snipping along a piece of coloured felt) A heat gun, or a hairdryer with a very high heat setting Scissors Objects to make your prints with; we used miniature cookie cutters, pasta, beads, knitting needles and a fork.
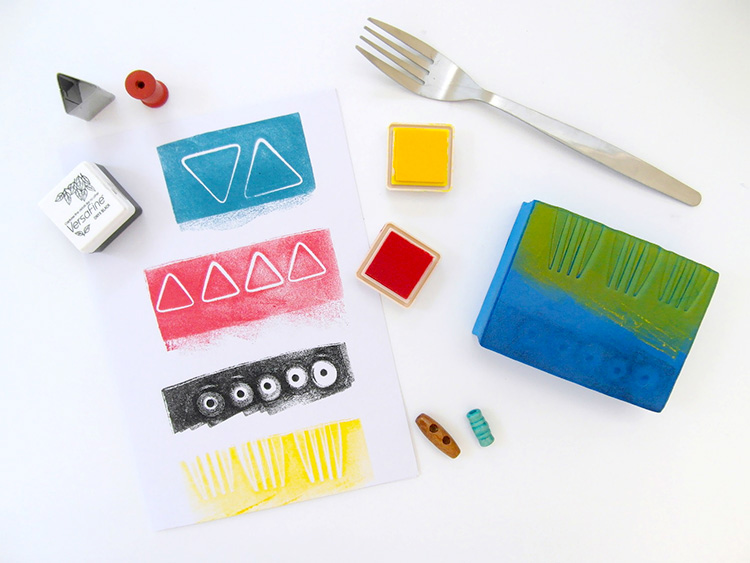
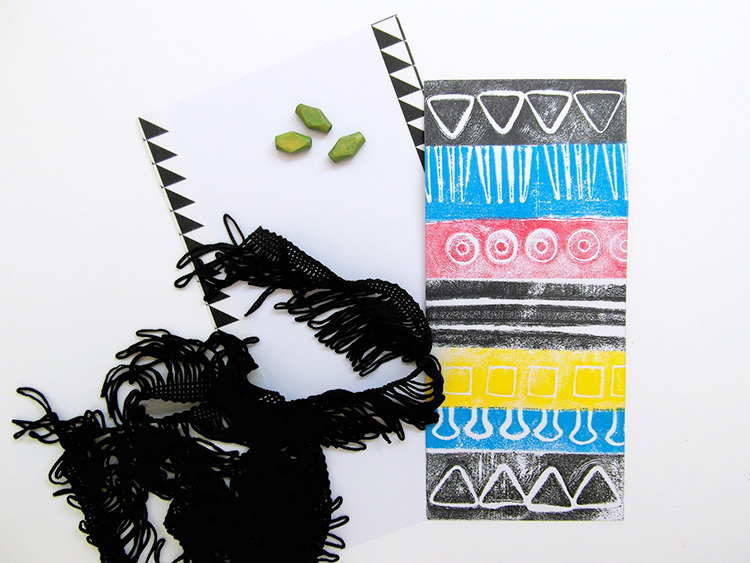
1. As with any crafts involving stamping and printing, it’s best to practice first; heat the foam gently using the hairdryer or heat gun, and then press one of your objects into it to leave an indentation. Repeat for the length of the foam, and then leave to cool slightly before inking, and stamping onto a spare piece of paper. 2. Once you’ve practised and decided which objects make the best patterns, place a plain sheet of card onto a flat surface, then add your first stamp at the top. Clean the foam using a baby wipe or soft cloth, then heat gently until the indentation disappears, and you can move onto your next object. 3. Repeat this process until you’ve covered the length of the card in different prints, then clean your foam stamp and set aside. 4. Leave your design to dry thoroughly, then trim around the edges so it fills the card. Place on top of another piece of white card and mount with glue so it forms a border.
5. Decorate the edges with washi tape, then using fabric glue, attach the length of fringing to the bottom of the card. 6. Turn your wall hanging over, and use some extra tape to secure the bakers twine to the back. Hang on the wall, and admire! Top Tips: 1. Moldable foam stamps are an ingenious invention, but can take a bit of getting used to. Practise until you’re happy with the indentations you have – the best thing about these stamps is how easy it is to remove something and start again. 2. Be careful when heating the foam; if you’re using a hairdryer, you’ll be able to get fairly close, but you’ll have to exercise a little more caution if you’re using a heat gun. Burning fingers and melting foam is a good indication that you’re way too close!
3. If you’re not filling the whole stamp with indentations, you’ll want to mask off the blank area with masking or washi tape when applying the ink – otherwise you’ll get a large, blotchy area of ink on your page. Simply add the tape, ink the stamp, remove the tape and then print – easy! 4. Think outside the box when looking for objects to use with your foam, and remember that things that look like they might work wonderfully can produce a mediocre print, and vice versa. Our best print was easily the fork, but the beads we chose initially didn’t work at all – the pattern just didn’t show up.
|

  Email: info (at) stickytiger.co.uk Phone: 0115 8800 700 |